
Get started
Quick start
From a fresh installation to a published course, one screen at a time. About fifteen minutes, plus however long the AI takes to write.
This walk-through assumes CourseForge is installed and you are signed in as the first administrator (Installation). You will create a profile, a course and its outline, write the pages and publish the book.
Tip
No AI account? You can still follow along: design the outline and write the pages from Claude Code or another AI client instead, as described in Connect an AI client. Everything from step 4 on works the same.
1. Create a profile#
A profile says who writes a course and where it goes. Open Profiles and click New profile. A profile has four tabs; for a first course you only need the first two.
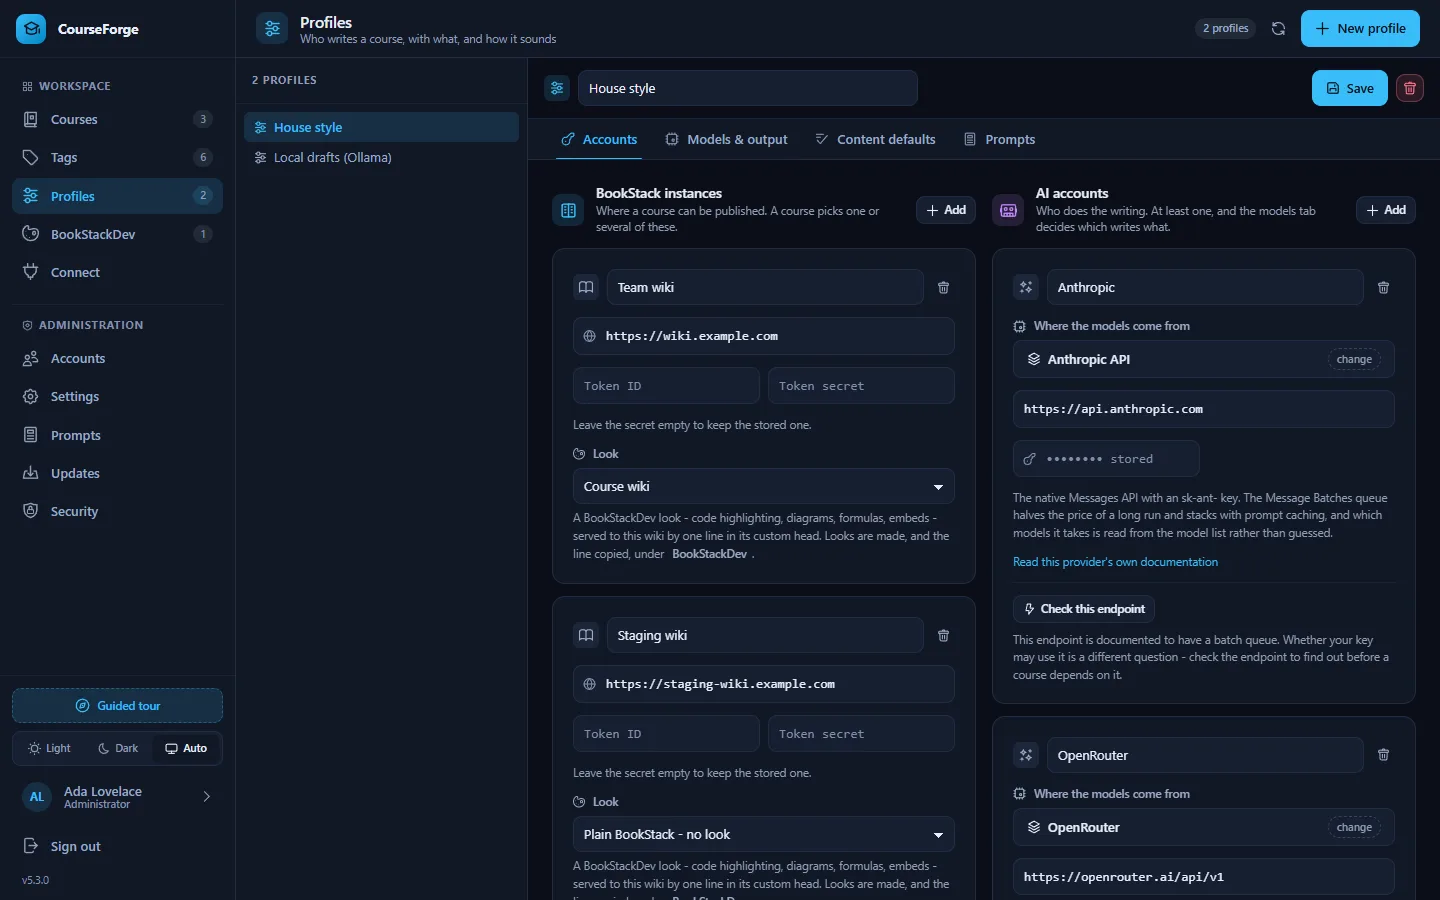
Accounts. Under AI accounts, click Add and choose a type:
- Anthropic API, OpenAI, Google Gemini or OpenRouter: paste the API key.
- One of sixteen presets (Groq, DeepSeek, Together, Mistral, a local Ollama…): the address and quirks are filled in; local servers need no key.
- Custom OpenAI-compatible endpoint: any address you type.
Click Check this account to fetch the model list and prove the key works. Then, if you want to publish, add a BookStack instance on the left: its base URL and an API token id and secret (in BookStack: your profile › Access & security › API tokens; the user needs permission to create books, chapters and pages).
Note
Key fields stay greyed out with a red mark until Administration › Security has passed. CourseForge refuses to store a secret in a database the web server might hand to anybody. See Security.
Models & output. Pick which account and model designs the outline and which writes the pages. A strong model for the outline is worth it: it is one request. Set the course language and how many pages are written in parallel. Tick write these pages through the provider's batch queue if you want the whole course at about half price and can wait up to a day.
Save. The other two tabs - Content defaults and Prompts - can wait. See Profiles.
2. Create a course#
Open Courses and click New course. Describe what should be taught, to whom and how far, in a full sentence. A good brief is specific:
Machine learning with Python - from a first linear model to a served pipeline,
for developers who already write Python but have never trained a model.
Pick the profile you just made. You land in the course workspace, which has five tabs: Structure, Content, Details, Publish and Settings.
3. Design the outline#
On the Structure tab, the AI panel is on the right. Click Design a new outline. One request later, the editor on the left holds the outline as Markdown, and the middle shows what Apply would make of it: the book title and tags, one box per chapter with its pages numbered, and each page's scope underneath.
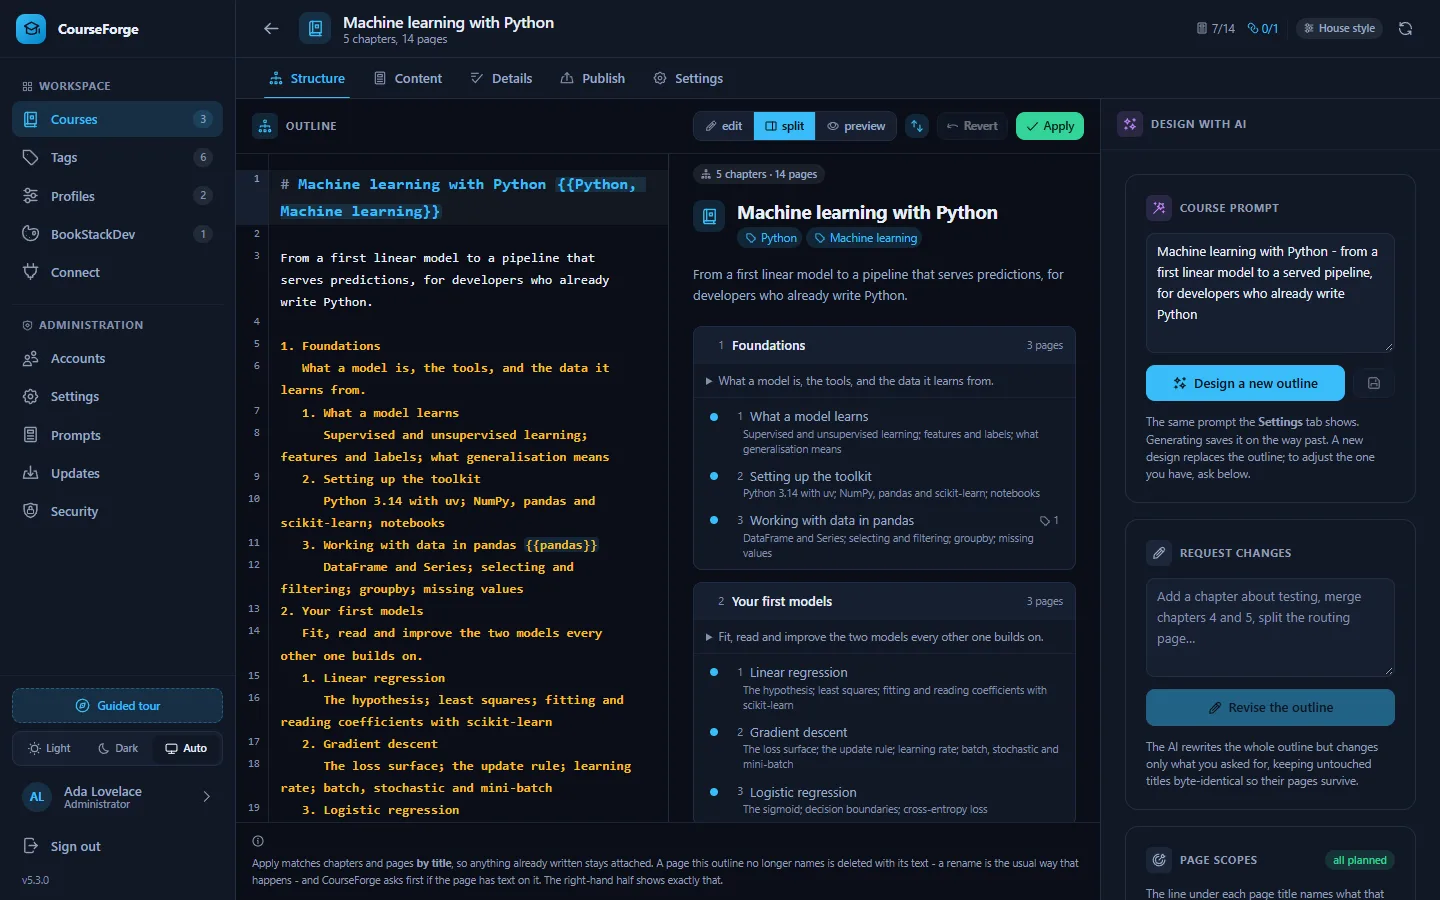
Read it. This is the cheapest moment to change the course:
- Edit the Markdown directly: rename, reorder, add or delete pages, rewrite a scope.
- Request changes in the AI panel: "merge chapters 4 and 5, add a chapter on testing". The AI revises the outline and keeps every title you did not ask it to change.
When it looks right, click Apply. Chapters and pages are created; nothing is written yet. The outline format is documented on The outline.
Tip
If some pages show no scope - an older outline, or pages you added by hand - click Plan missing scopes. One request plans them all, so every page knows what its neighbours cover.
4. Decide what a page contains#
The Details tab decides what every page of the course is made of: learning objectives, a summary, exercises, code examples, tables, callouts, Mermaid diagrams, formulas, Anki cards, cross references, web research - and how long a page should be. Each row inherits from the profile and the installation until you switch it on or off here.
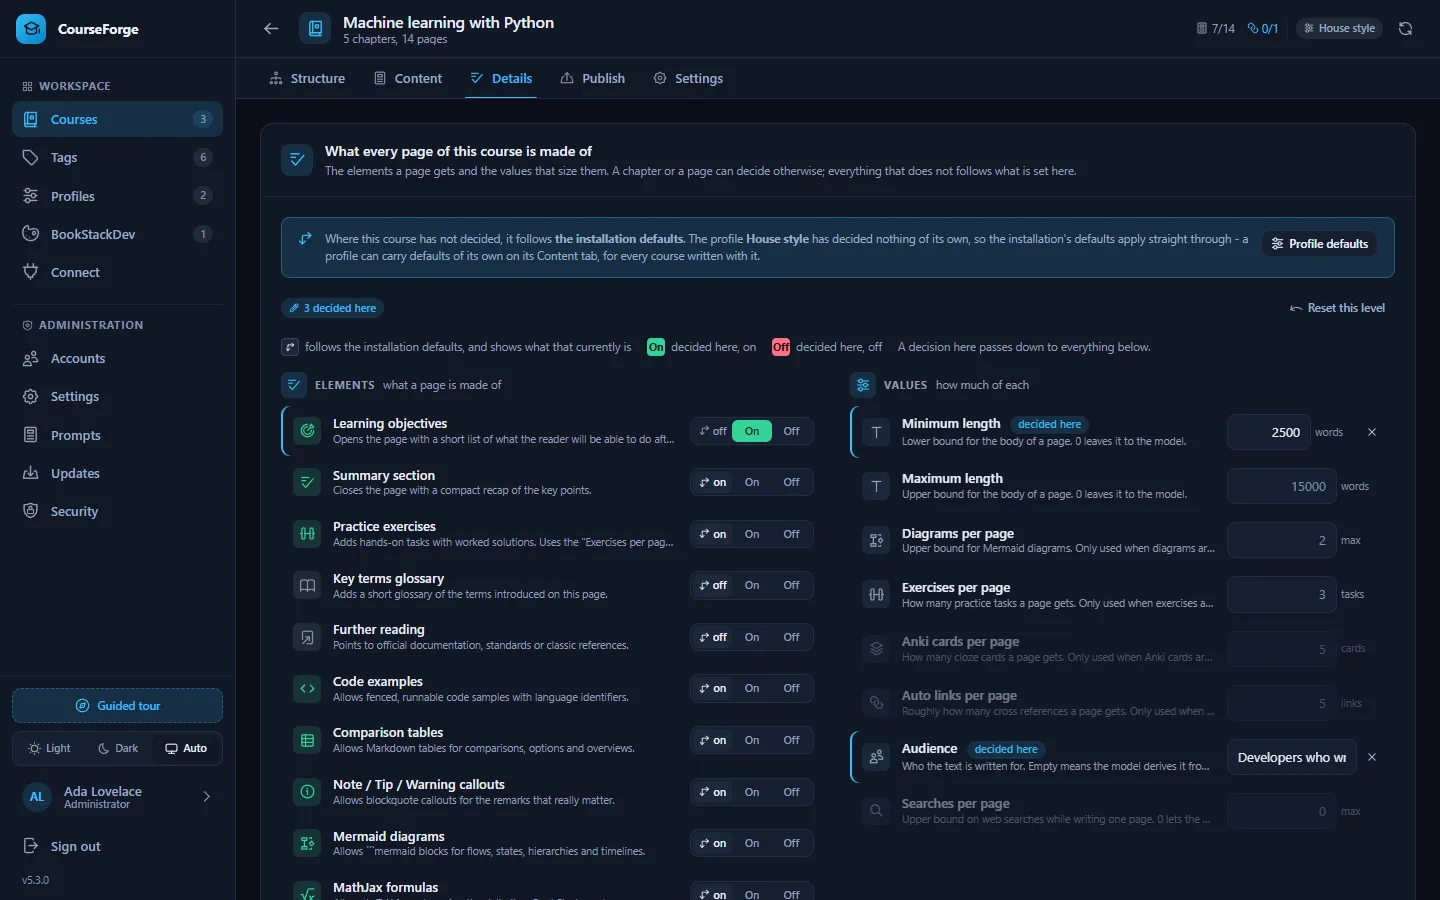
Chapters and pages can override the course in the Content tab's inspector. See Content details.
5. Write the pages#
Open the Content tab. The outline is on the left with a status dot per page, the editor in the middle and the inspector on the right.
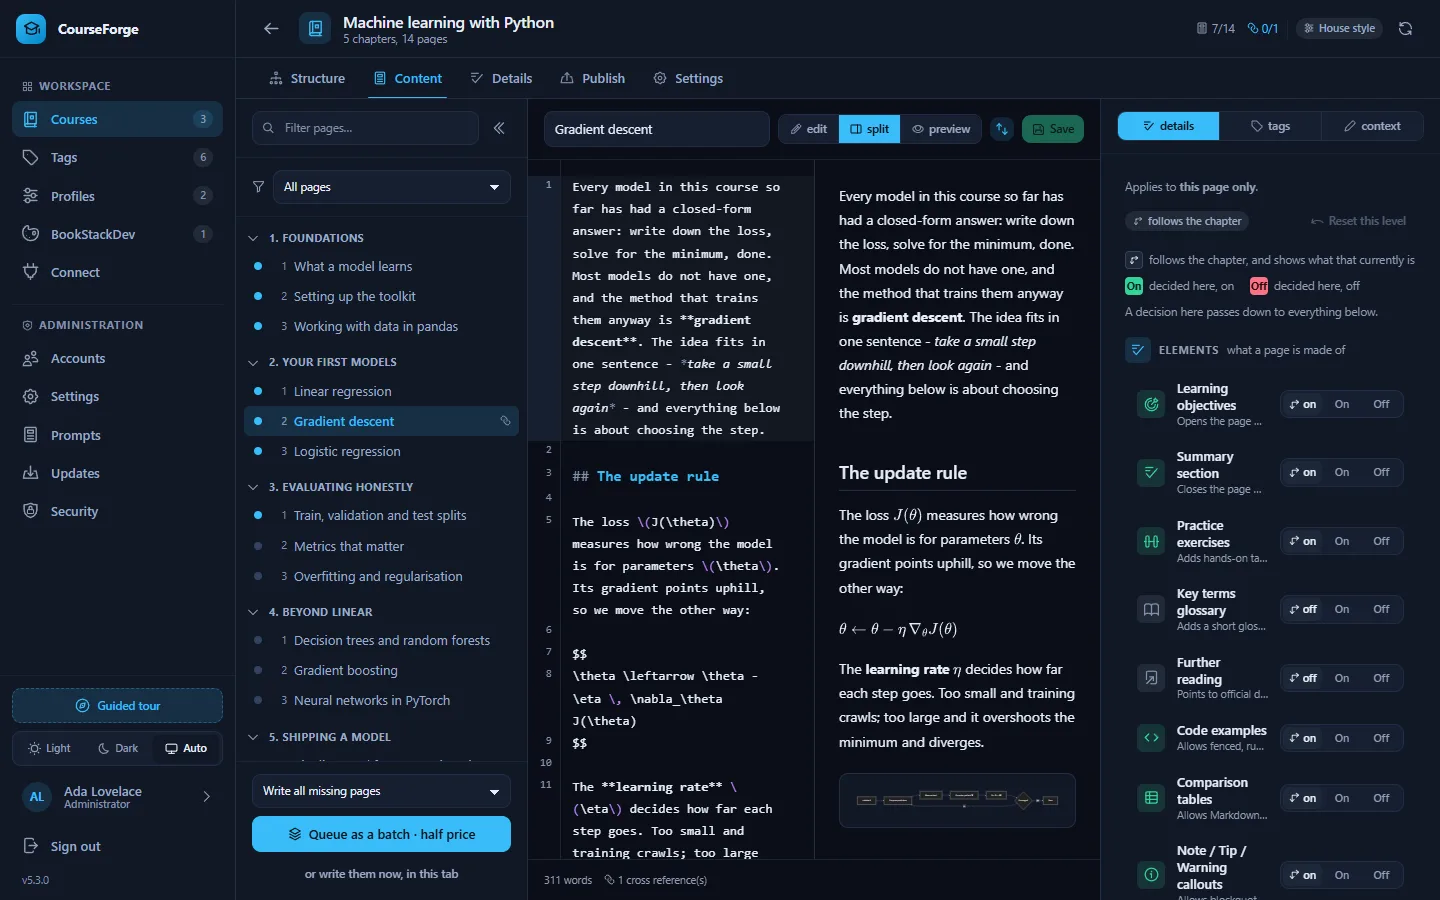
At the bottom of the outline, choose what to write - Write all missing pages, Write the next N pages, Retry the failed pages or Rewrite everything - and start it:
| Choice | What happens | Close the tab? |
|---|---|---|
| Write them here | The browser writes N pages at a time and you watch each land. | No |
| Start run | The server writes them in the background, from the scheduler. | Yes |
| Queue as a batch | The provider's batch queue writes them within a day, at about half price. | Yes |
Which buttons appear depends on the profile and on whether the scheduler is running. A run shows as a card with its own progress; it is still there tomorrow. Before a large run, the estimate tells you how many pages and roughly how many tokens are involved. See Runs.
6. Review and refine#
Click a page to open it. The editor is a full Markdown editor (Ctrl+S saves); the preview renders code, diagrams and formulas the way BookStack will.
- To change a page by hand, edit it and save.
- To have the AI rewrite it with a correction, write the correction into the feedback box and click Rewrite this page: "the second example uses a deprecated API; use the current one".
- To give the AI facts it should treat as given for one page, use the context tab of the inspector. The page's scope is there too.
See Writing pages.
7. Publish#
Open the Publish tab. Click Add destination, pick the BookStack instance from your profile, load its shelves, pick one, and Save. Then click Publish everything.
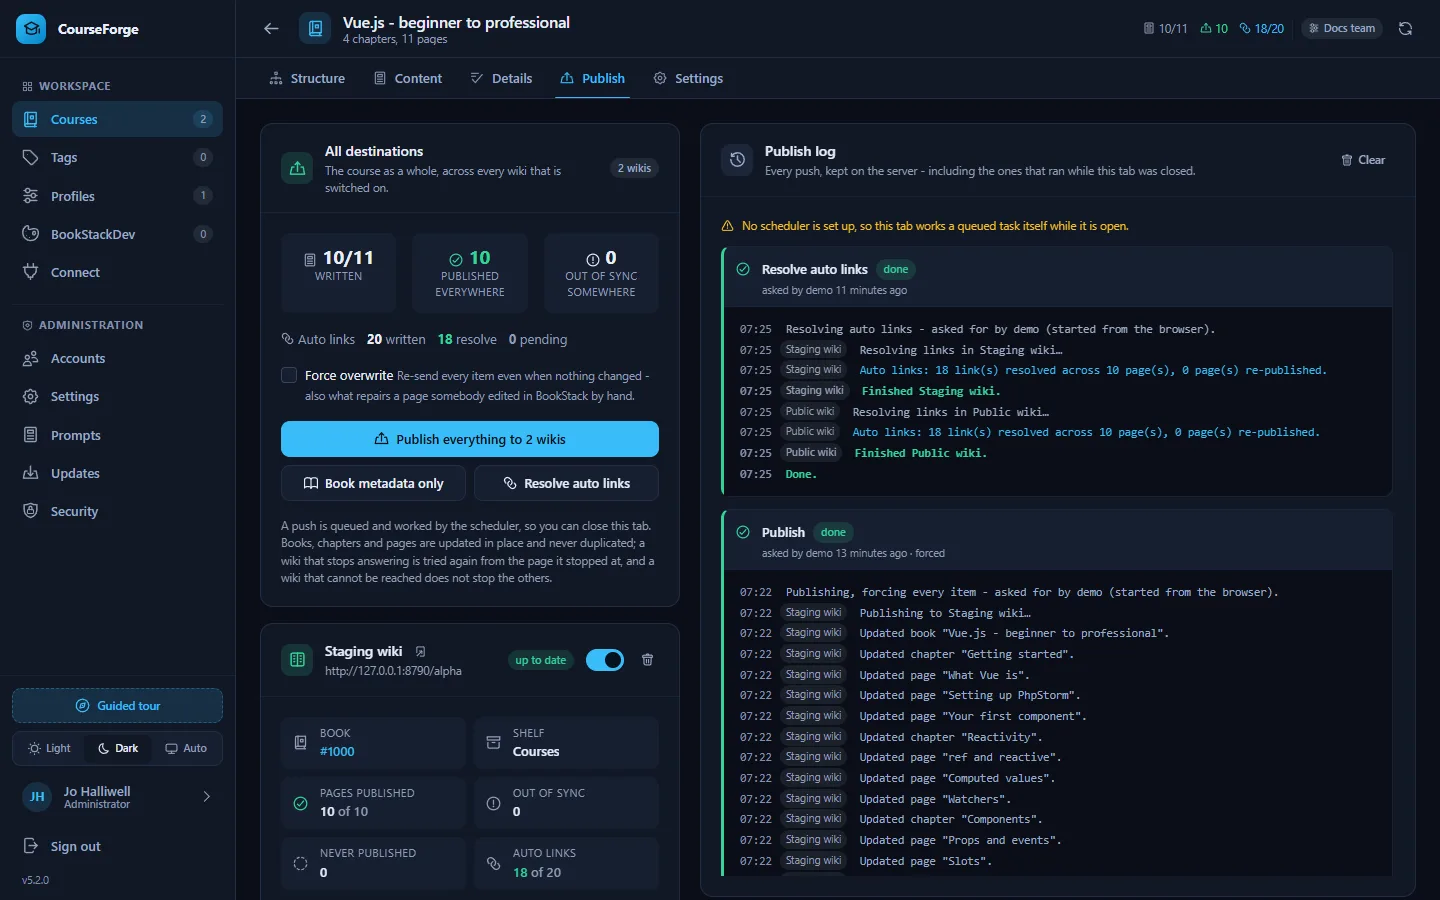
The push is a task: you can close the tab and it carries on (with the scheduler running). CourseForge creates the book, puts it on the shelf, creates every chapter and page with its tags, and resolves cross references into real links at the end. Publishing again later only sends what changed. See Publishing.
Where to go from here#
- Make BookStack render code, diagrams and formulas properly: BookStackDev.
- Write courses from Claude Code or the Claude app: Connect an AI client.
- Invite colleagues: Accounts and roles.
- Tune what the AI is told: The prompt library.